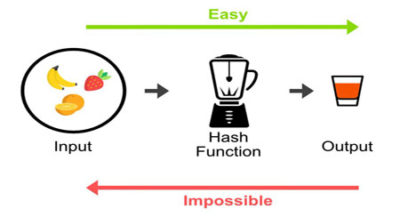
When an user visits your website, a lot of data is exchanged “behind the scenes” between user’s browser and the web server that hosts your website, including HTTP headers (typically a “Request” from user’s browser, and a “Response” from the web server).

Among the different types of response headers, there are 10 headers (recommended by OWASP) called HTTP security headers, specifically designed to counteract the different threats used by hackers and attackers, who can send forged data using different tools (even a web browser), to exploit vulnerabilities in your website (Cross-site scripting, SQL injection, MIME-type sniffing, and others).
1) HTTP Strict Transport Security (HSTS)
HTTP protocol (HyperText Transfer Protocol), is the protocol behind the Internet network.
Unlike the HTTP version where data is transmitted “in clear text”, HTTPS (HyperText Transfer Protocol over Secure Socket Layer) uses data encryption (SSL certificate), to prevent data from being intercepted and read by malicious users.
What are the risks?
Installing an SSL certificate on your site is not enough to protect you from attacks. You must set up an HSTS header to fully protect your site and users.
A typical example is a Remote Banking site, which has not set up the HSTS header, to which a user connects though an airport’s Wi-Fi network, to check the balance of his banking account and perhaps pay some bills, unaware that the point of access to the Wi-Fi network, is actually the laptop of a hacker who has cloned the bank’s site, and is able to intercept the user’s request for connection by stealing the user’s access credentials to the Remote Banking site. This type of attack is called a man-in-the-middle attack.
How do I protect my site and my visitors?
To avoid this type of attack, just setup HSTS header on your server.
This way, users’ browsers will be forced to use only the encrypted HTTPS protocol.
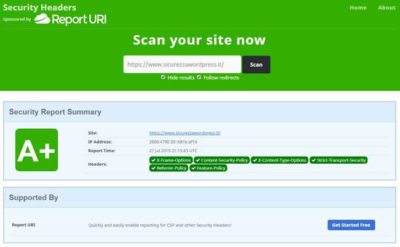
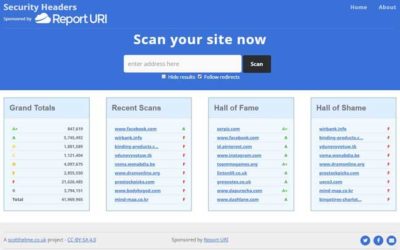
To check whether this header has been setup on your site or not, you can use the Netsparker scanner at: https://securityheaders.com
In the results page, the headers on your site will be marked in green, those missing in red.
If it hasn’t been setup, add the following directives in server’s configuration file.
ATTENTION: If your website hasn’t an SSL certificate, before adding this header, install an SSL certificate.
Apache
Add in .htaccess file in the root directory of your site
Nginx
Add in Nginx’s configuration file (nginx.conf)
2) Public Key Pinning (HPKP)
The Public Key Pinning header allows to associate an SSL certificate with a specific root certification authority, an intermediate certification authority, or a public key.
This protects against unauthorized certificate issuance that would allow an attacker to use man-in-the-middle techniques to steal access credentials and other sensitive data.
What are the risks?
The main risk is that the certification authority, which issued the certificates installed on your website, might be compromised and fraudulent certificates might be issued to replace existing authentic certificates. In this way, legitimate traffic would be diverted to systems owned by the malicious user, stealing access credentials and confidential data.
How do I protect my site and my visitors?
Since the implementation of this header is rather delicate and complicated, it is advisable to set it up only on mission-critical systems (Remote Banking, eCommerce).
In case you need to implement it on your own server, we suggest you follow the instructions provided by Scott Helme in his article “HPKP: HTTP Public Key Pinning” at: https://scotthelme.co.uk/hpkp-http-public-key-pinning/
To check whether this header has been setup on your site or not, you can use the Netsparker scanner at: https://securityheaders.com
In the results page, the headers on your site will be marked in green, those missing in red.
3) X-Frame-Options (XFO)
X-Frame-Options header (also called XFO) allows to protect website’s visitors, against “clickjacking” technique. This technique, quite simple to setup, allows to redirect users to a different content than the one chosen by the user when clicking on a link on your site, content that remains invisible to the end user (through the use of structures called iframes, made invisible thanks to CSS code).
Through this technique it is possible to steal confidential information, such as access credentials to remote banking sites, credit card numbers or others.
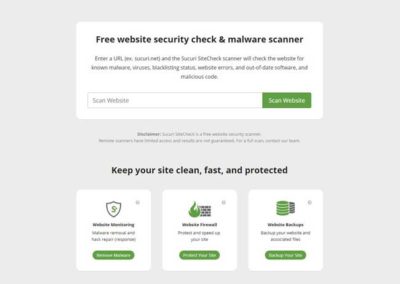
How do I check if there are iframes on my site?
To check whether or not there are iframes on your site, you can use the scanner provided by Sucuri at: https://sitecheck.sucuri.net
After scanning, at the top, click on the item “More Details” then in the window displayed, at the bottom, click on the link “iframes included”.
How do I protect my site and my visitors?
To protect your website, you can setup an X-Frame-Options header.
To check whether this header has been setup on your site or not, you can use the Netsparker scanner at: https://securityheaders.com
In the results page, the headers on your site will be marked in green, those missing in red.
If it hasn’t been setup, add the following directives in server’s configuration file.
Apache
Add in .htaccess file in the root directory of your site
Nginx
Add in Nginx’s configuration file (nginx.conf)
4) X-XSS-Protection (XSS)
XSS stands for Cross-site scripting and is a type of vulnerability of Web applications. In OWASP Top Ten ranking, in terms of importance, this type of vulnerability ranks second after the SQL Injections.
Cross-site scripting allows to hack a vulnerable web application (typically a dynamic web site) by inserting malicious code into it, which is then executed by user’s browser when he visits the hacked website and infection occurs without the knowledge of the end user.
Then, in case the user has a privileged access to the application (administrator user), the hacker will be able to take full possession of the system and the data available in the hacked website.
How do I check if there are XSS vulnerabilities on my site?
There are several tools to check if there are XSS-type vulnerabilities in your website, some are free, but most are paid solutions.
Free
Scan My Server
This service allows to perform an in-depth scan for XSS and SQL injection vulnerabilities, completely free of charge, with the limitation, however, to perform only one scan per week.
To test the service, create an account at:
https://scanmyserver.com/registration.html
Select the “Free” package.
At the end of the registration you will be asked to insert a code snippet in your website’s footer, in order to verify that you own the site you are going to assess.
Pentest-tools
XSS Scanner (ZAP OWASP)
This service uses the Opensource ZAP (OWASP) scanner. The free mode provides a scan of only 20 url, for a total time of only 2 minutes.
To get a more in-depth scan (500 url and 30 minutes duration) you need to register and pay €45/month or €250 for a year.
Qualys FreeScan Community Edition
https://www.qualys.com/community-edition/#/freescan
Paid
- Detectify (https://detectify.com/)
- Acunetix (https://www.acunetix.com/vulnerability-scanner/free-website-vulnerability-scanner-online/)
- Swascan (https://www.swascan.com/it/#vulnerability-assessment)
- Netsparker (https://www.netsparker.com/online-web-application-security-scanner/)
How do I protect my site and my visitors?
The best protection against XSS attacks is the correct validation settings, data sanitization and escaping provided by the programming language used to build the web application.
For more information, please refer to the OWASP guidelines:
1) Reflected and stored XSS
https://cheatsheetseries.owasp.org/cheatsheets/Cross_Site_Scripting_Prevention_Cheat_Sheet.html
2) DOM based XSS
https://cheatsheetseries.owasp.org/cheatsheets/DOM_based_XSS_Prevention_Cheat_Sheet.html
To protect your site against XSS attacks, you can set up the X-XSS-security header.
ATTENTION: The X-XSS-Protection header only protects against reflected vulnerabilities.
To check whether this header has been setup on your site or not, you can use the Netsparker scanner at: https://securityheaders.com
In the results page, the headers on your site will be marked in green, those missing in red.
If it hasn’t been setup, add the following directives in server’s configuration file.
Apache
Add in .htaccess file in the root directory of your site
Nginx
Add in Nginx’s configuration file (nginx.conf)
5) X-Content-Type-Options (XCTO)
XCTP header was introduced by Microsoft in the Internet Explorer browser version 8.
When activated, it specifies that the MIME-types published in the Content-Type header must be followed and cannot be changed.
What are the risks?
By setting the X-Content-Type-Options header, the server is protected against attempted MIME type sniffing, a technique that allows you to turn a non-executable MIME type into an executable, jeopardizing system security.
How do I protect my site and my visitors?
To protect your website against this type of threat, the
Content-Type-Options header should be setup with the nosniff parameter.
To check whether this header has been setup on your site or not, you can use the Netsparker scanner at: https://securityheaders.com
In the results page, the headers on your site will be marked in green, those missing in red.
If it hasn’t been setup, add the following directives in server’s configuration file.
Apache
Add in .htaccess file in the root directory of your site
Nginx
Add in Nginx’s configuration file (nginx.conf)
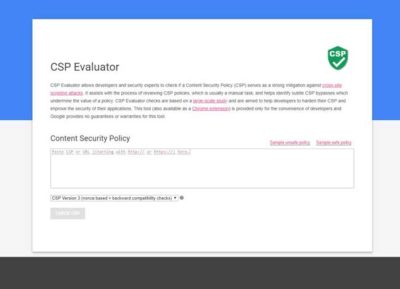
6) Content-Security-Policy (CSP)
Thanks to the Content-Security-Policy header, you can granularly define the source of each single content (font, javascript, style sheets, etc.) of your website, elements that will then be loaded by the visitor’s browser.
What are the risks?
The most important risk is that malicious scripts are entered by an attacker into the main page of the site, which are then loaded by the visitor’s browser, completely unknowingly and silently.
How do I protect my site and my visitors?
The Content-Security-Policy header provides number of settings to accurately define the sources of your site’s content.
For this reason, implementing a correct policy can take a long time and effort, and can even break your website (error 500 Internal server error) that can be easily recovered by disabling the policy.
The policy indicated below, is a basic model that should work for most websites.
In case of errors, you should temporarily disable the header, and check with the CSP Evaluator tool (Google) for configuration errors or incompatibilities.
To check whether this header has been setup on your site or not, you can use the Netsparker scanner at: https://securityheaders.com
In the results page, the headers on your site will be marked in green, those missing in red.
If it hasn’t been setup, add the following directives in server’s configuration file.
Apache
Add in .htaccess file in the root directory of your site
Nginx
Add in Nginx’s configuration file (nginx.conf)
7) X-Permitted-Cross-Domain-Policy (XPCDP)
Programs such as Adobe Acrobat or Flash use a same-origin concept, which can sometimes allow access to domains other than the original one.
What are the risks?
If the XPCDP header is not setup in your website, content might be used for illicit purposes by malicious users.
How do I protect my site and my visitors?
To protect the content of your site, add the XPCDP header to the configuration file of your webserver.
To check whether this header has been setup on your site or not, you can use the Netsparker scanner at: https://securityheaders.com
In the results page, the headers on your site will be marked in green, those missing in red.
If it hasn’t been setup, add the following directives in server’s configuration file.
Apache
Add in .htaccess file in the root directory of your site
Nginx
Add in Nginx’s configuration file (nginx.conf)
8) Referrer Policy (RP)
When a visitor clicks on a link available in your website, and it brings him to visit an external website, the user’s browser headers will transmit the address of origin and that means your website’s address.
How do I protect my site and my visitors?
This policy offers numerous options from which to choose the one that best suits your needs.
In the example below, the option you choose is “no referrer”.
To check whether this header has been setup on your site or not, you can use the Netsparker scanner at: https://securityheaders.com
In the results page, the headers on your site will be marked in green, those missing in red.
If it hasn’t been setup, add the following directives in server’s configuration file.
Apache
Add in .htaccess file in the root directory of your site
Nginx
Add in Nginx’s configuration file (nginx.conf)
9) Expect-CT (ECT)
Expect-CT header is a new header proposed by Google, to fix some SSL/TLS protocol issues.
How do I protect my site and my visitors?
If you use a CDN service (e.g. Cloudflare) the ECT header is automatically set by the CDN service.
If you want to set it up, just add it to the configuration file of your web server.
To check whether this header has been setup on your site or not, you can use the Netsparker scanner at: https://securityheaders.com
In the results page, the headers on your site will be marked in green, those missing in red.
If it hasn’t been setup, add the following directives in server’s configuration file.
Apache
Add in .htaccess file in the root directory of your site
Nginx
Add in Nginx’s configuration file (nginx.conf)
10) Feature-Policy (FP)
Feature-Policy header, is a new header (released in 2018) that allows to enable or disable in a very granular way, the features in the user’s browser.
How do I protect my site and my visitors?
The FP header offers numerous options to configure in detail the features allowed and not allowed.
The policy shown in the example below is a basic policy that should work for most websites.
To check whether this header has been setup on your site or not, you can use the Netsparker scanner at: https://securityheaders.com
In the results page, the headers on your site will be marked in green, those missing in red.
If it hasn’t been setup, add the following directives in server’s configuration file.
Apache
Add in .htaccess file in the root directory of your site
Nginx
Add in Nginx’s configuration file (nginx.conf)
In summary
You can implement all the headers in a single block, using the following example:
Apache
Add in .htaccess file in the root directory of your site
Nginx
Add in Nginx’s configuration file (nginx.conf)
ATTENTION: Before adding these directives to your server’s configuration, I suggest you to disable all directives by commenting them (putting a # sign at the beginning of each directive) and then enabling them one at a time, checking each time whether your site is working or not.
In case of errors (error 500) just disable the directive that creates problems.